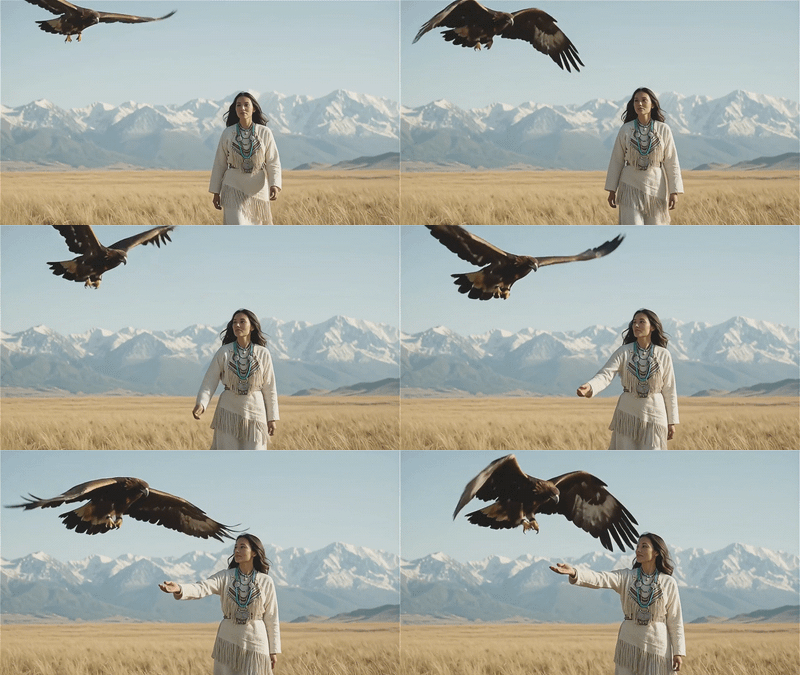
Wan Animate 2 · Motion Transfer R2V
Transfer the motion from any reference video onto a character photo using Wan Animate 2, Alibaba's open-source 14B video model. Upload an image, upload a video, and hit run.
character animation
motion transfer
wan 2.2
wan animate 2
0
57

Nodes & Models
LoadImage
KSamplerSelect
GetVideoComponents
LoadVideo
CLIPTextEncode
UNETLoader
wan2.2_animate_14B_bf16.safetensors
ImageStitch
LoraLoaderModelOnly
lightx2v_I2V_14B_480p_cfg_step_distill_rank64_bf16.safetensors
VAEDecode
CreateVideo
CLIPLoader
umt5_xxl_fp8_e4m3fn_scaled.safetensors
VAELoader
Wan2_1_VAE_bf16.safetensors
GetImageSize
ComfyMathExpression
ResizeImageMaskNode
CLIPVisionLoader
clip_vision_h.safetensors
BasicScheduler
SamplerCustom
ImageFromBatch
ContextWindowsManual
BatchImagesNode
CLIPVisionEncode
WanAnimate2ToVideo
ModelSamplingSD3
ComfySwitchNode
SaveVideo
TrimVideoLatent
PreviewAny
WanAnimate2Cache
PrimitiveBoolean
ABOUT THE WORKFLOW
Animate a photo with video motion
Upload a photo of your character and a video of the motion you want. The model reads the movement from the video and applies it to your character, keeping their face, outfit, and look intact. You get back two videos: the animated character on its own, and a side-by-side against the reference clip.
Model
Wan Animate 2 by Alibaba Tongyi Lab. A 14B open-source video model in the Wan 2.2 series, strong at full-body motion transfer, character replacement, and holding a character's identity across a clip.
HOW IT WORKS
Step 1. Upload your reference image
The character or subject you want animated. A clear, front-facing photo with the whole body visible gives the model the most to work with.
Works great with: character art · portraits · 3D renders · product mascots
Step 2. Upload your reference video
The motion source. Whatever moves in this clip is what your character will do. Dance clips, walk cycles, gestures, and acted performances all work. No skeleton extraction or pose rig needed.
Step 3. Describe the character and background (optional)
Inside the Motion Transfer node there is a prompt field. Filling it in helps the model hold identity through the clip. Example: "Character Description: cartoon fox in a red jacket. Background description: empty white studio room."
Step 4. Hit run and download
The model animates the frames, rebuilds them into a video with the reference audio, and saves two files: the character video and a side-by-side comparison with the source clip.
Ready for: Premiere · After Effects · DaVinci Resolve · Blender
First time? Leave every setting as-is. The defaults (832 x 480 · 81 frames · pose strength 1) are the right starting point for almost everyone.
RECOMMENDED SETTINGS
Quick-start guide. Find the goal that matches yours and copy the settings.
Standard motion transfer (most people) — 832 x 480 · 81 frames · pose strength 1 · reference image strength 0 · random seed. This is the tested default and the right starting point for almost everyone.
Want a longer clip? — Raise the frame count above 81. At 24 fps, 81 frames runs about 3.4 seconds. Time and memory climb with every frame you add, so move up in steps rather than jumping.
Want a different aspect ratio? — Change width and height, and keep both as multiples of 16. Values that are not multiples of 16 fail the run outright.
Want the character look to hold harder? — Raise reference image strength above 0. Useful when the outfit or face starts sliding partway through the clip.
The motion drifts or looks stiff — Lower pose strength below 1 before touching anything else. A looser follow often reads more naturally than a rigid one.
The character loses identity mid-clip — Fill in the character and background description in the prompt field, then raise reference image strength. Shorter clips also hold identity better than long ones.
Want to reproduce an exact result? — Set the seed to a fixed number instead of random. Same seed plus same inputs returns the same take, so you can change one setting at a time and compare.
Prompt: The prompt field is optional, and it works best as a plain description of who the character is and where they are, not as a motion instruction. The video already supplies the motion. "Character Description: a woman in a blue denim jacket. Background description: a bare grey wall" holds identity better than "a person dancing energetically."
LEARN
📹 Videos
ComfyUI 101 Free Course ft. Sebastian Kamph
Floyo 101 for Team Collaboration
✨ Quick links
USE CASES
🕺 Character Animation
Film yourself doing the movement, then hand it to an illustrated or 3D character and get a finished performance without keyframing.
🎬 Previs and Animatics
Block out a shot by acting the motion on a phone camera, then run it onto your actual character design to see how the beat reads before committing to a full animation pass.
📱 Social and Short-Form Content
Put a mascot, avatar, or original character into a trending dance or gesture clip, with the reference audio carried through to the output.
🎮 Game and Concept Work
Test how a character design holds up in motion. The side-by-side output makes it easy to check the transfer against the source clip in one file.
👕 Fashion and Product Demos
Take a still of a styled outfit or a costumed character and give it a walk, a turn, or a gesture instead of shooting a full video session.
WHAT WORKS BEST / WHAT TO AVOID
✅ Works great
Clear, front-facing full-body character photos
Reference videos with one clearly visible subject
Steady framing and even lighting in the source clip
Clips around 81 frames, with a written character description
⚠️ May produce softer results
Close-up hand gestures and fine finger detail
Very long sequences, where identity starts to drift
Crowded reference videos with several people moving
Heavily occluded, cropped, or side-profile character photos
FAQ
What is Wan Animate 2?
Wan Animate 2 is an open-source video model from Alibaba's Tongyi Lab, released in August 2026 as part of the Wan 2.2 series. It has 14B parameters and performs motion transfer: it takes one character image and a driving video, then animates the character to match the movement. It is licensed under Apache 2.0.
How does motion transfer work in Wan Animate 2?
You give it two things: a reference image of a character and a video of the motion. The model reads the movement directly from the video and applies it to your character, holding the face, outfit, and design across the clip. There is no separate pose extraction or skeleton rig step, so you do not need a motion capture pipeline or an OpenPose pass.
Do I need a motion capture setup or a pose rig to use this?
No. A regular video file is enough. Phone footage, a stock clip, or a screen recording all work as the motion source, as long as the subject is clearly visible and the framing is reasonably steady.
Can I use Wan Animate 2 for commercial projects?
Yes. Wan Animate 2 is released under the Apache 2.0 license, which permits commercial use. You still need the rights to the character image and the reference video you feed in, so check the source of both before shipping the result.
What resolution and clip length does this workflow output?
The tested default is 832 x 480 at 81 frames, which runs about 3.4 seconds at 24 fps. You can raise the resolution and the frame count, but both increase generation time and memory. Width and height must be multiples of 16 or the run fails.
Does Wan Animate 2 generate audio?
No. The model has no native audio generation. This workflow carries the audio from your reference video through to the output, so the animated clip keeps the original sound.
What is the difference between Wan Animate 2 and a standard image-to-video model?
A standard image-to-video model invents motion from a text prompt, so you describe what should happen and accept whatever you get. Wan Animate 2 copies motion from a video you supply, which means you control the exact performance, timing, and gesture. Use image-to-video when you want the model to improvise, and this when you already know the movement you want.
How to run Wan Animate 2 online?
You can run Wan Animate 2 online through Floyo. No installation, no setup, no API key to wire up. Open the workflow in your browser, upload your inputs, and hit run. Free to try.
WHY FLOYO?
Floyo is the only platform with team collaboration for ComfyUI in the browser. You run workflows with no install. You share run history, assets, and models across your team. You pay only when you generate. Floyo supports open-source and closed-source models.
A designer runs an edit and likes the result. A teammate opens that exact run from shared history and keeps going. No file handoffs. No version confusion.
For studios and enterprise teams, Floyo adds private workspaces, pooled resources, and a team usage dashboard. Other ComfyUI cloud tools run for one person at a time. Floyo runs for the whole team, with transparent per-generation costs.
Ready to try it?
Upload a character photo and a motion video, then run it. The settings are already set.
Questions? Watch the free course or check the FAQ above.
Read more