

Qwen_Image_2.1_Image_to_Image
Qwen Image 2.1を使用したImage to Imageワークフローです。オープンソースモデルのためAPIウォレットを消費せず、構図維持、画像編集、スタイル変更、参照画像を使った再生成に活用できます。ネイティブ2K出力にも対応しています。 This is an Image to Image workflow using Qwen Image 2.1. It uses an open-source model.
Image
Image to Image
Open Source
Qwen Image 2.1
661
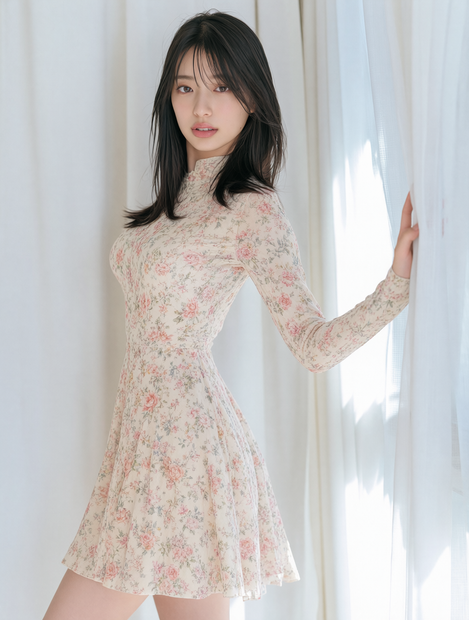
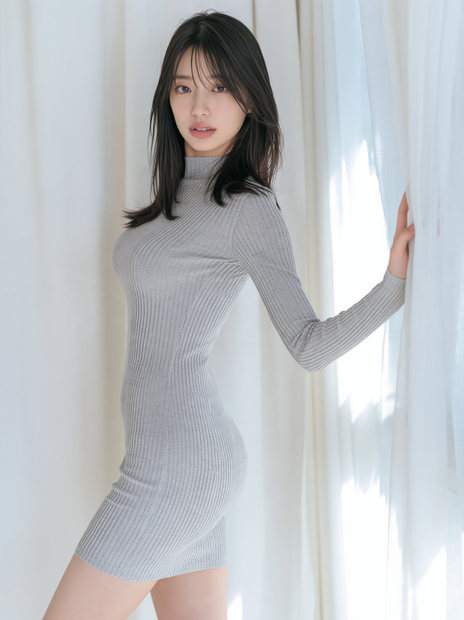
Nodes & Models
MarkdownNote
PrimitiveStringMultiline
LoadImage
TextEncodeQwenImage21
UNETLoader
qwen_image_2.1_int8_convrot.safetensors
SaveImageAdvanced
CLIPLoader
qwen3vl_8b_int8_convrot.safetensors
qwen3.5_9b_qwen_image_2.1_pe_i2i.int8_convrot.safetensors
ImageCompare
VAELoader
qwen_image_2.1_vae_bf16.safetensors
EmptyLatentImage
VAEDecode
KSampler
ComfySwitchNode
QwenImage21Cache
PreviewAny
BatchImagesNode
TextGenerate
1. Overview|概要
このワークフローは、Qwen Image 2.1を使用したImage to Image用の画像生成ワークフローです。
This workflow is an Image to Image generation workflow using Qwen Image 2.1.
image_1に編集したい元画像をアップロードし、プロンプトで編集内容を指定して再生成できます。
Upload the image you want to edit to image_1, then describe the edit instruction in the prompt.
Qwen Image 2.1はオープンソースモデルのため、APIウォレットを消費せずに画像生成できます。
Since Qwen Image 2.1 is an open-source model, you can generate images without consuming your API wallet.
元画像の構図、被写体、雰囲気を活かしながら、見た目やスタイルを変更できます。
You can change the look or style while preserving the composition, subject, and mood of the source image.
image_1が編集対象で、image_2〜image_10は参照画像として使用できます。
image_1 is the edit target, and image_2 to image_10 can be used as reference images.
最大10枚の参照画像を使えるため、衣装、顔、画風、背景、商品、質感などを参照しながら編集できます。
Because up to 10 reference images can be used, you can edit while referencing outfits, faces, styles, backgrounds, products, and textures.
Qwen Image 2.1はネイティブ2K出力にも対応しています。
Qwen Image 2.1 also supports native 2K output.
1024x1024相当の標準出力から、2048x2048相当の高解像度出力まで対応できます。
It supports standard output around 1024x1024 and high-resolution output up to 2048x2048.
人物画像、商品画像、キャラクター画像、背景画像、素材画像の編集に活用できます。
It can be used for editing portraits, product images, character images, background images, and design assets.
APIウォレットを消費しないため、検証やプロンプト調整を繰り返しやすい構成です。
Since it does not consume your API wallet, it is easy to test and refine prompts repeatedly.
2. How It Works|使い方
image_1に、編集したい元画像をアップロードしてください。
Upload the source image you want to edit to image_1.
image_1は編集対象となるメイン画像です。
image_1 is the main image to be edited.
必要に応じて、image_2〜image_10に参照画像をアップロードしてください。
If needed, upload reference images to image_2 through image_10.
参照画像は最大10枚まで使用できます。
You can use up to 10 reference images.
プロンプト内では、参照画像を <image1>、<image2>、<image3> のように指定できます。
In the prompt, you can refer to the images as <image1>, <image2>, <image3>, and so on.
たとえば、<image1> の人物に <image2> の衣装を着せる、のように指示できます。
For example, you can instruct it to dress the person in <image1> with the outfit from <image2>.
image_1以外の参照画像は、サイズやアスペクト比が異なっていても使用できます。
Reference images other than image_1 can have different sizes or aspect ratios.
基本的には、image_1をアップロードし、promptを変更するだけですぐに使えます。
Basically, you can use it immediately by uploading image_1 and changing the prompt.
生成ボタンを押すと、image_1をもとに新しい画像が生成されます。
Press the Generate button to create a new image based on image_1.
必要に応じて、ResolutionSelectorやcustom_sizeで出力サイズを調整してください。
If needed, adjust the output size using ResolutionSelector or custom_size.
初めて使う場合は、まずデフォルト設定のまま試すのがおすすめです。
For first-time use, it is recommended to start with the default settings.
3. Prompt Control|プロンプトによる調整
promptには、元画像をどう編集したいかを具体的に書いてください。
In prompt, clearly describe how you want to edit the source image.
参照画像を使う場合は、<image1>、<image2>、<image3> のようにプロンプト内で指定してください。
When using reference images, mention them in the prompt as <image1>, <image2>, <image3>, and so on.
image_1は編集対象なので、基本的には <image1> を中心に指示してください。
Since image_1 is the edit target, give instructions mainly around <image1>.
image_2以降は、衣装、顔、背景、画風、商品、質感などの参照として使えます。
image_2 and later can be used as references for outfits, faces, backgrounds, styles, products, and textures.
元画像の雰囲気を保ちたい場合は、keep the same mood と指定してください。
If you want to preserve the original mood, write keep the same mood.
構図を保ちたい場合は、keep the same composition と指定してください。
If you want to preserve the composition, write keep the same composition.
顔を保ちたい場合は、keep the same face と指定してください。
If you want to preserve the face, write keep the same face.
髪型を保ちたい場合は、keep the same hairstyle と指定してください。
If you want to preserve the hairstyle, write keep the same hairstyle.
衣装だけを変更したい場合は、change only the outfit と指定してください。
If you want to change only the outfit, write change only the outfit.
背景だけを変更したい場合は、change only the background と指定してください。
If you want to change only the background, write change only the background.
画風を変更したい場合は、anime illustration、realistic photo、concept art、3D render などを指定してください。
If you want to change the style, specify styles such as anime illustration, realistic photo, concept art, or 3D render.
質感を変更したい場合は、cinematic lighting、soft light、glossy texture、matte texture などを指定してください。
If you want to change the texture, specify terms such as cinematic lighting, soft light, glossy texture, or matte texture.
人物画像を編集する場合は、維持したい要素と変更したい要素を分けて書くと安定しやすくなります。
For portrait editing, results are more stable when you separate what to preserve and what to change.
商品画像を編集する場合は、商品形状、素材、背景、光、余白、広告風レイアウトを具体的に書いてください。
For product image editing, describe the product shape, material, background, lighting, margin, and advertising-style layout clearly.
短いプロンプトでも生成できますが、維持したい要素と変更したい要素を明確に書くほど安定しやすくなります。
Short prompts can work, but clearly describing what to preserve and what to change makes the result more stable.
4. Size|サイズ
Qwen Image 2.1は、ネイティブ2K、2048x2048の直接出力に対応しています。
Qwen Image 2.1 supports native 2K direct output at 2048x2048.
resolutionはwidthやheightではなく、総ピクセル量の目安です。
resolution is a total pixel budget, not the width or height.
アスペクト比は元画像に合わせて維持されます。
The aspect ratio is preserved based on the source image.
公式デフォルトは1024です。
The official default is 1024.
モデルは最大2048まで対応しています。
The model supports up to 2048.
このテンプレートでは、初期値は0です。
This template starts at 0.
0の場合、32の倍数に合わせる以外のリサイズは行いません。
When set to 0, no resize is applied except aligning to a multiple of 32.
出力サイズはimage_1に従います。
The output follows image_1.
image_2以降の参照画像は、サイズやアスペクト比がimage_1と異なっていても使用できます。
Reference images from image_2 onward can have different sizes or aspect ratios from image_1.
custom_sizeがoffの場合、キャンバスはencode latent、つまりimage_1から決まります。
When custom_size is off, the canvas comes from the encode latent, meaning image_1.
custom_sizeがonの場合、ResolutionSelectorのwidthとheightを使用します。
When custom_size is on, the workflow uses the width and height from ResolutionSelector.
custom_sizeをonにする場合は、リサイズ後のimage_1に近いサイズを指定してください。
When turning custom_size on, set the size close to the resized image_1.
image_1とかけ離れたサイズを指定すると、編集結果がズレる場合があります。
If the size is too different from image_1, the edit may shift.
ネイティブ2Kで出力したい場合は、用途に合わせて2048相当の設定を選択してください。
For native 2K output, choose a setting equivalent to 2048 based on your use case.
解像度は32の倍数にすると安定しやすいです。
Using resolution values that are multiples of 32 helps improve stability.
5. Reference Images|参照画像
このワークフローでは、最大10枚の参照画像を使用できます。
This workflow supports up to 10 reference images.
image_1からimage_10まで使用できます。
You can use image_1 through image_10.
image_1は編集対象となるメイン画像です。
image_1 is the main image to be edited.
image_2からimage_10は参照画像として使用します。
image_2 to image_10 are used as reference images.
プロンプト内では、<image1>、<image2>、<image3> のように指定してください。
In the prompt, refer to them as <image1>, <image2>, <image3>, and so on.
たとえば、<image1> の人物に <image2> の服を着せる、のように書けます。
For example, you can write: dress the person in <image1> with the outfit from <image2>.
たとえば、<image1> の商品を <image2> の背景に配置する、のように書けます。
For example, you can write: place the product from <image1> in the background style of <image2>.
たとえば、<image1> のキャラクターを <image3> の画風に変換する、のように書けます。
For example, you can write: convert the character in <image1> into the art style of <image3>.
参照画像を増やしすぎると、情報が競合する場合があります。
Using too many reference images may cause information conflicts.
重要な参照画像ほど、プロンプト内で明確に役割を指定してください。
The more important a reference image is, the more clearly you should define its role in the prompt.
安定させたい場合は、image_1を編集対象、image_2を最重要参照のように役割を分けるのがおすすめです。
For stable results, it is recommended to separate roles, such as image_1 as the edit target and image_2 as the main reference.
Read more

_1786518453053.png?width=400&height=300&quality=80&resize=cover)




