Mage Flow for Text to Image
Generate images from a text prompt with Mage-Flow, Microsoft's open-weight 4B image model. Pick an aspect ratio, describe the picture you want, and hit run.
ai image generator
int8
mage flow
mage-flow
microsoft
open source image model
qwen3-vl
text to image
138
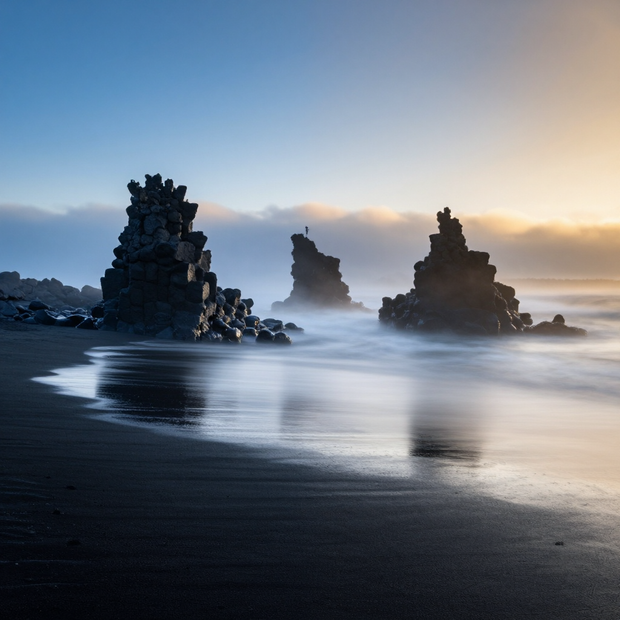

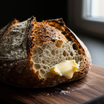

Nodes & Models
ResolutionSelector
UNETLoader
mage_flow_int8_convrot.safetensors
CLIPLoader
qwen3vl_4b_bf16.safetensors
VAELoader
mage_flow_vae_bf16.safetensors
TextEncodeMageFlowEdit
KSampler
VAEDecode
SaveImageAdvanced
ABOUT THE WORKFLOW
Write a prompt, get an image Type a description of the picture you want, pick the shape and size, and hit run. The workflow builds the image over 30 passes and saves it as a PNG. Nothing to upload.
Model
Mage-Flow by Microsoft. A 4 billion parameter open-weight image model that scores highest of any open model on the GenEval prompt-following test, ahead of FLUX.2 at 32B and Qwen-Image at 20B. This is the full quality version, packed down to int8 so it fits on smaller cards.
HOW IT WORKS
Step 1. Write your prompt Describe the subject, the framing, the light, and the style. Plain descriptive sentences work better than a list of keywords, because the prompt is read by the Qwen3-VL language model. Works great with: studio photography · product shots · portraits · illustration
Step 2. Pick the shape and size Set the aspect ratio and the megapixels. The default is 1:1 at 1 megapixel, which lands near 1024 by 1024. Anything from 512 to 2048 pixels per side works, at any shape up to 4:1.
Step 3. Add a negative prompt (optional) Empty by default. Name anything that keeps turning up and you do not want, like "text, watermark, extra fingers." Leave it blank on a first run.
Step 4. Hit run and download The image comes back as an 8-bit sRGB PNG saved under Mage_flow. Preview it in the workflow, then download. Ready for: Photoshop · Figma · Canva · InDesign
First time? Leave every setting as-is. The defaults (1:1 · 1 megapixel · 30 steps · guidance 5 · random seed) are the right starting point for almost everyone.
RECOMMENDED SETTINGS
Quick-start guide. Find the goal that matches yours and copy the settings.
Standard generation (most people) — 1:1 · 1 megapixel · 30 steps · guidance 5 · random seed. The right starting point for almost everyone.
Want a poster or banner shape — Change the aspect ratio and leave megapixels at 1. The width and height follow the ratio, so a wide 16:9 or a tall 9:16 keeps the same overall pixel count.
Want a sharper, larger image — Raise megapixels toward 2 or higher. Sides can run up to 2048 pixels. Generation takes longer as the count goes up.
Want a faster test run — Drop steps to 15 or 20 to see whether the composition is close before committing to a full pass. Results look softer at low step counts.
Want to reproduce an image you liked — Switch the seed from random to fixed and enter the number from the run you want back. Same seed and same prompt returns the same image.
The image ignores part of your prompt — Rewrite the prompt before touching a setting. Move the important detail to the front of the sentence and describe it in full words rather than adding it as a keyword at the end.
The image looks harsh or over-contrasted — Lower guidance from 5 toward 3.5. High guidance forces the model onto the prompt and can burn out skin tones and highlights.
Prompt: Write it as a description someone could read aloud. "A model in an oversized wool coat against a clay backdrop, one softbox front-left, rim light on the shoulder, high fashion studio photography, muted palette" gives the model far more to work with than "fashion photo, coat, studio, 8k." Name the subject, then the framing, then the light, then the style.
LEARN
📹 Videos
ComfyUI 101 Free Course ft. Sebastian Kamph
Floyo 101 for Team Collaboration
✨ Quick links
USE CASES
📸 Studio and Product Imagery Describe the set, the lens, and the lighting, and get a clean studio frame without booking a shoot.
🎨 Concept Art and Mood Boards Turn a written idea into a reference image, then rerun with the same seed to explore variations of one look.
📐 Campaign Assets in Any Shape Generate the same concept as a square post, a wide banner, and a tall story frame by changing one setting.
🎓 Teaching Prompt Writing Show a class how sentence structure changes the output, with a model that follows detailed prompts closely enough to make the difference visible.
WHAT WORKS BEST / WHAT TO AVOID
✅ Works great
Long descriptive sentences that name subject, framing, light, and style
Photographic and studio subjects with a clear light setup
Unusual aspect ratios, including extreme wide and tall frames
Fixed seeds when you want to test one prompt change at a time
⚠️ May produce softer results
Comma-separated keyword lists with no sentence structure
Guidance pushed well above 5
Step counts below 15
Sides beyond 2048 pixels, which sit outside the tested range
FAQ
What is Mage-Flow? Mage-Flow is an open-weight text-to-image model from Microsoft Research, released in July 2026 at 4 billion parameters. It pairs a lightweight latent tokenizer called Mage-VAE with a native-resolution diffusion transformer, and uses Qwen3-VL to read the prompt. The family also covers instruction-based image editing and a 4-step Turbo variant.
How does Mage-Flow compare to FLUX.2 and Qwen-Image? Mage-Flow scores 0.90 on GenEval, the highest of any open model, against 0.87 for FLUX.2 at 32B and 0.87 for Qwen-Image at 20B. It reaches that with 4 billion parameters, so it follows prompts more closely than models five to eight times its size while using far less memory. Larger models still hold an edge on some other benchmarks.
Is Mage-Flow free for commercial use? Yes. Mage-Flow ships under the MIT licence, which covers personal and commercial work with no royalty or usage restriction from the model side. You are responsible for what you generate and for any rights attached to material you reference in a prompt.
What resolutions and aspect ratios does Mage-Flow support? One checkpoint handles 512 to 2048 pixels per side at any aspect ratio, including extreme ratios up to 4:1. There are no fixed resolution buckets, so a 512 by 2048 portrait or a 2048 by 512 letterbox comes out of the same model as a square. This workflow sets size through aspect ratio and megapixels rather than raw width and height.
What is the difference between Mage-Flow and Mage-Flow Turbo? Turbo is a 4-step distilled version built for speed, generating a 1024 by 1024 image in well under a second on an A100. This workflow runs the full quality version at 30 steps, which is slower but holds more detail and follows long prompts more closely. Pick Turbo for rapid iteration and this one for final frames.
What does the int8 version mean for GPU requirements? Int8 stores the model weights at lower precision, which cuts memory use with a small quality trade-off against the full precision weights. It lets the full quality Mage-Flow run on cards that would otherwise be short on VRAM. Nothing changes in how you use the workflow.
How to run Mage-Flow online? You can run Mage-Flow online through Floyo. No installation, no setup, no API key to wire up. Open the workflow in your browser, type a prompt, and hit run. Free to try.
WHY FLOYO?
Floyo is the only platform with team collaboration for ComfyUI in the browser. You run workflows with no install. You share run history, assets, and models across your team. You pay only when you generate. Floyo supports open-source and closed-source models.
A designer runs an edit and likes the result. A teammate opens that exact run from shared history and keeps going. No file handoffs. No version confusion.
For studios and enterprise teams, Floyo adds private workspaces, pooled resources, and a team usage dashboard. Other ComfyUI cloud tools run for one person at a time. Floyo runs for the whole team, with transparent per-generation costs.
Ready to try it? Type a prompt, pick a shape, and run it. Everything else is already set.
Questions? Watch the free course or check the FAQ above.
Read more