FLUX.2 Klein 9B · Multi-image Edit + Upscale
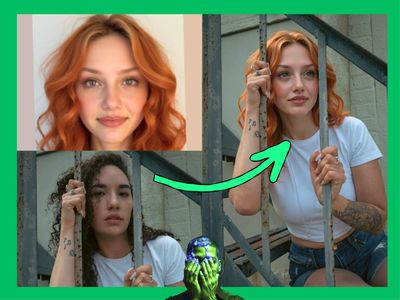
Edit one photo using a second as reference, then refine and 4x upscale it with FLUX.2 Klein 9B by Black Forest Labs. Upload two images, describe the edit, run.
flux2
flux.2 klein
Image
image editing
image to image
350
_1785419692848.png?width=1400&height=620&quality=80&resize=contain)
_1785419692848.png?width=1400&height=620&quality=80&resize=contain)
_1785419692848.png?width=104&height=104&quality=80&resize=cover)
_1785419692848.png?width=104&height=104&quality=80&resize=cover)


Nodes & Models
LoadImage
UNETLoader
Flux2-Klein-9B-True-bf16.safetensors
CLIPLoader
qwen_3_8b_fp8mixed.safetensors
VAELoader
flux2-vae.safetensors
UpscaleModelLoader
4x-ClearRealityV1.pth
LoraLoaderModelOnly
Klein-Migration-flux-2-klein-9b-multi-uCB5L2So.safetensors
Flux2-Klein-9B-consistency-V2-flux-2-klein-9b-multi-uCB5L2So.safetensors
CLIPTextEncode
SaveImage
ConditioningZeroOut
VAEDecode
EmptyFlux2LatentImage
KSampler
VAEEncode
ReferenceLatent
ImageScaleToTotalPixels
GetImageSize
ResizeImageMaskNode
ImageBlend
ImageUpscaleWithModel
ImageSharpen
FloyoStickyNote
ABOUT THE WORKFLOW
Edit and upscale with two images
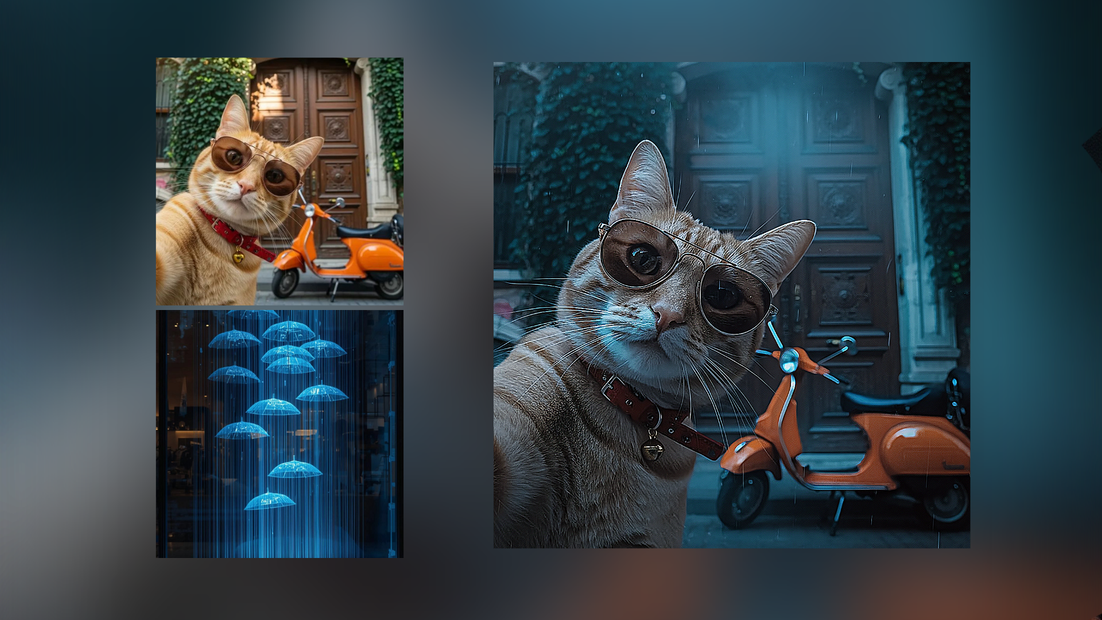
Upload two photos and describe how to combine them. The model edits the first image using the second as a reference for lighting, colour, or style, refines the result, then upscales it. You get three outputs: the raw edit, the refined version, and the upscaled final.
Model
FLUX.2 Klein 9B by Black Forest Labs. A fast image generation and editing model that runs in a few steps on consumer hardware. Open weights under the FLUX Non-Commercial License. Paired here with a Migration LoRA for multi-image editing and a Consistency LoRA for coherent results, plus a 4x ClearReality upscaler.
HOW IT WORKS
Step 1. Upload your main image (image 1)
The photo you want to edit.
Works great with: portraits · product shots · scenes · designs
Step 2. Upload a reference image (image 2)
Its lighting, colour, or style gets transferred onto image 1.
Step 3. Describe the edit
Say what to bring across, like "replace the lighting with the lighting from image 2" or "add the window-blind shadow from image 2."
Step 4. Hit run and download
The model edits, refines, and upscales, then returns three outputs: raw, refined, and upscaled.
Ready for: Photoshop · Figma · print · web
First time? Leave every setting as-is. The defaults (4 steps · refine 0.3 · blend 0.7 · 2 MP) are the right starting point for almost everyone.
RECOMMENDED SETTINGS
Quick-start guide. Find the goal that matches yours and copy the settings.
Standard use (most people) — 4 steps, guidance 1, refine 0.3, blend 0.7, 2 MP upscale. The right starting point for almost everyone.
Keep more of the raw edit — lower the refine strength below 0.3 so the second pass changes less. Raise it to push the refinement further.
Favour the raw look over the refined — lower the blend below 0.7. Higher leans the final toward the refined version.
Want a bigger final image — raise the upscale target above 2 megapixels for a larger export after the 4x pass.
The edit is not following image 2 — name the exact thing to transfer, like the lighting, the colour cast, or a specific shadow, and say it comes from image 2.
Want the exact same result again — set a fixed seed in place of random. Random gives you a fresh take on each run.
Prompt: Name what to carry from image 2 and where it lands on image 1. "Replace the lighting in image 1 with the warm lighting from image 2, keep the subject" is clearer than "combine these." Point to the specific element, whether that is lighting, colour, or a shadow, and say which image it comes from.
LEARN
📹 Videos
ComfyUI 101 Free Course ft. Sebastian Kamph
Floyo 101 for Team Collaboration
✨ Quick links
USE CASES
💡 Lighting Transfer
Relight a photo using the lighting from a reference shot, then export it at higher resolution.
🎨 Style & Colour Match
Carry a reference image's colour grade or mood onto another photo.
🛍️ Product Consistency
Match a product shot to a reference look and upscale it for the store page.
🖼️ Composite Cleanup
Blend an element from a reference into your main image and finish at a larger size.
WHAT WORKS BEST / WHAT TO AVOID
✅ Works great
Two clear images with a defined relationship
A specific element to transfer, named in the prompt
Clean, well-lit source photos
Similar framing between the two images
⚠️ May produce softer results
Vague prompts like "mix these"
A reference image with a busy, competing look
Mismatched subjects with no shared context
Low-resolution source images
FAQ
What is FLUX.2 Klein 9B?
FLUX.2 Klein 9B is a fast open-weights image model from Black Forest Labs that handles both generation and editing. It is step-distilled to run in about four steps on consumer hardware and supports editing with more than one reference image. This workflow uses it to edit one photo with a second as reference.
How does two-image editing work here?
Image 1 is the photo you edit, and image 2 is the reference. A Migration LoRA lets the model pull lighting, colour, or style from image 2 and apply it to image 1 based on your prompt. A Consistency LoRA keeps the result coherent, and the workflow then refines and upscales it.
Why do I get three outputs?
The workflow saves each stage so you can pick the one you like. Raw is the first edit, refined is a second pass shaped by the refine strength and blend settings, and upscaled is the refined image run through a 4x upscaler and resized to your target resolution.
What is the difference between refine strength and blend?
Refine strength controls how much the second pass changes the raw edit, so a lower value keeps more of the original result. Blend then mixes the refined and raw versions together before the upscale, with a higher value leaning toward the refined one.
Can I use FLUX.2 Klein 9B commercially?
The 9B model this workflow uses is released under the FLUX Non-Commercial License, which covers research and non-commercial use. The smaller Klein 4B is Apache 2.0, and Black Forest Labs offers a self-hosted commercial license for the 9B. The community LoRAs and the upscaler carry their own terms, so check all of them before commercial use.
How is Klein different from FLUX.2 dev?
Klein is the small, fast side of the FLUX.2 family, built to run quickly on consumer hardware in a handful of steps. FLUX.2 dev is a much larger model aimed at maximum quality. This workflow uses Klein 9B so the edit, refine, and upscale run without a heavy GPU.
How to run FLUX.2 Klein online?
You can run FLUX.2 Klein online through Floyo. No installation, no setup, no API key to wire up. Open the workflow in your browser, upload two images, describe the edit, and hit run. Free to try.
WHY FLOYO?
Floyo is the only platform with team collaboration for ComfyUI in the browser. You run workflows with no install. You share run history, assets, and models across your team. You pay only when you generate. Floyo supports open-source and closed-source models.
A designer runs an edit and likes the result. A teammate opens that exact run from shared history and keeps going. No file handoffs. No version confusion.
For studios and enterprise teams, Floyo adds private workspaces, pooled resources, and a team usage dashboard. Other ComfyUI cloud tools run for one person at a time. Floyo runs for the whole team, with transparent per-generation costs.
Ready to try it?
Upload two images, describe the edit, and run it. The settings are already set.
Questions? Watch the free course or check the FAQ above.
Read more