MOSS Image for Layout-Guided Text to Image
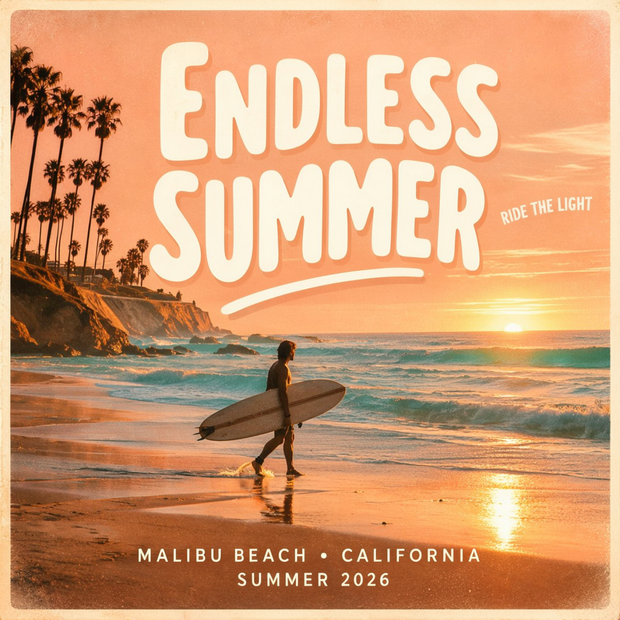
Place text and objects exactly where you want them using bounding boxes, then generate the image with MOSS-Image, OpenMOSS’s 5B layout-controlled model. Draw boxes, label them, write a prompt, and hit run.
Image
Layout Guided
MOSS Image
Text to Image
53


ABOUT THE WORKFLOW
Place text and objects, then generate
Draw bounding boxes on a canvas to set where text and objects appear. Label each box with the words to render or a description of what goes there. Write a prompt for the overall scene. The model generates one image with everything placed as drawn.
Model
MOSS-Image SFT by OpenMOSS. A 5B open source diffusion transformer built for accurate text rendering and bounding-box layout control in English and Chinese.
HOW IT WORKS
Step 1. Pick an aspect ratio
Choose the output shape and size. The default is 1:1 square at 1 megapixel (1024x1024).
Works great with: posters · social cards · editorial layouts
Step 2. Draw bounding boxes
Open the bounding box editor and drag a box for each element. Label each box: for text boxes, type the exact words to render. For object boxes, describe what goes there.
Step 3. Write a prompt
Describe the overall scene, style, and mood. The bounding boxes handle where things go. The prompt handles what the image looks and feels like.
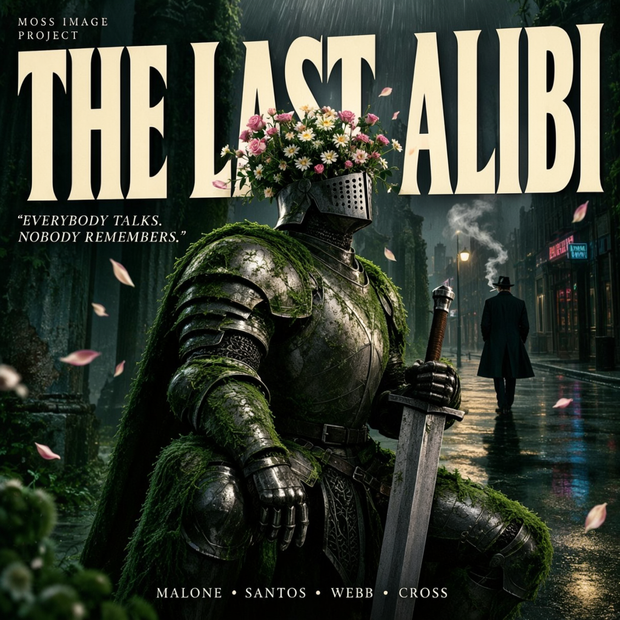
Example: “Dark fantasy editorial poster in a lush overgrown ruin, soft volumetric light, deep green and moss palette with muted cream type.”
Step 4. Hit run and download
The layout prompt and scene prompt combine and feed into the model. One image comes back with text and objects placed as drawn.
Ready for: Photoshop · Figma · Canva · print
First time? Leave every setting as-is. The defaults are the right starting point for almost everyone.
RECOMMENDED SETTINGS
Resolution / Dimensions
Width & Height must be multiples of 16 (enforced by the ResolutionSelector’s
multiple: 16setting)Minimum safe resolution: 512×512 (going lower risks incoherent output and wasted generation)
Maximum safe resolution: ~1 megapixel total (e.g. 1024×1024, 1280×768, 768×1280). Going past 1MP is slower and may soften output per the workflow’s own notes
Default: 1024×1024 (1:1 Square, 1MP)
Steps
Minimum: 10 (below this, output will be undercooked/noisy)
Maximum safe: ~50 (diminishing returns; generation time increases linearly)
Default: 25
CFG (Classifier-Free Guidance)
Minimum: 1.0 (very loose prompt adherence)
Maximum safe: ~5.0 (higher risks artifacts and oversaturation with this model)
Default: 2.5
Seed
Minimum: 0
Maximum: any valid int64 value
Default: random — set a fixed number only to reproduce a specific result
Prompt Enhancer (enable_prompt_enhancer)
Default:
false(OFF)⚠️ Must stay OFF when using bounding boxes — enabling it rewrites the layout JSON and will break box placement entirely
Only turn ON if you’re doing plain text-to-image with no bounding boxes
SLG (Skip Layer Guidance)
Default:
true(ON)Sharpens detail — generally leave it on
Turning it off may soften output but won’t error
Bounding Boxes
Minimum: 0 (falls back to plain text prompt)
Maximum: no hard cap, but too many overlapping boxes will confuse layout adherence
Each box needs a
type(textorobj), adesc, and for text boxes the actualtextcontentBoxes must fit within the canvas dimensions (width/height) — coordinates outside the canvas will error or be ignored
Sampler / Scheduler
Default sampler:
er_sdeDefault scheduler:
simpleChanging these may work but the defaults are tuned for this model — swapping to incompatible samplers risks black images or artifacts
Reference Image (ref_image)
Optional — fed to the LLM for prompt enhancement only
The model itself does NOT use it directly
Only useful if prompt enhancer is ON
Models (don’t change unless you know what you’re doing)
UNet:
moss_image_sft_int8_convrot.safetensorsCLIP:
qwen3.5_9b_w4a8_gptq.safetensorsVAE:
flux2-vae_small.safetensorsThese are pre-loaded on Floyo — swapping to other checkpoints will likely break the pipeline
TL;DR — safest operating range:
Resolution: 512–1024px per side, must be ×16, stay ≤1MP total
Steps: 15–35
CFG: 1.5–4.0
Prompt Enhancer: OFF when using bounding boxes
SLG: ON
Don’t touch the model files
LEARN
📹 Videos
ComfyUI 101 Free Course ft. Sebastian Kamph
Floyo 101 for Team Collaboration
✨ Quick links
USE CASES
🎨 Poster and Editorial Design
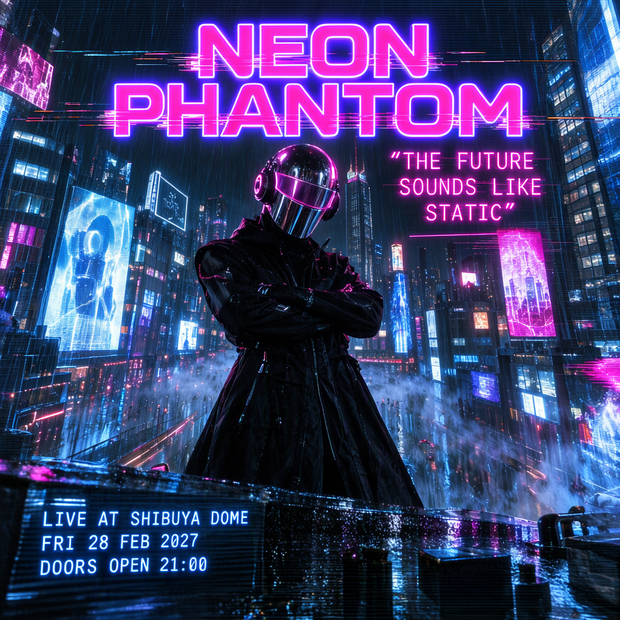
Draw headline text, body copy, and a hero image into position and generate a complete poster layout in one pass.
📱 Social Media Graphics
Place titles, logos, and visual elements exactly where they need to land for Instagram, TikTok, or LinkedIn formats.
🎬 Title Cards and Storyboards
Generate scene cards with readable titles, credits, or dialogue overlays baked into the image at specific positions.
🛍️ Product Marketing Layouts
Position product descriptions, pricing text, and hero shots together in a single generated graphic for campaigns or e-commerce.
📖 Book Covers and Album Art
Set the title, author name, and central visual in their correct positions and generate a finished cover concept.
WHAT WORKS BEST / WHAT TO AVOID
✅ Works great
Clear, well-spaced bounding boxes with room between them
Short, readable text strings (titles, headlines, taglines)
Scene prompts that describe mood and style, not layout
English and Chinese text rendering
⚠️ May produce softer results
Tiny boxes with long text strings crammed in
Overlapping or tightly packed bounding boxes
Prompt enhancer enabled while using layout boxes
Very small text at low resolution
FAQ
What is MOSS-Image?
MOSS-Image is a 5-billion-parameter open source text-to-image model from OpenMOSS. It is built on a single-stream diffusion transformer architecture with a Qwen 3.5 9B text encoder. Its main strength is accurate text rendering and layout control through JSON bounding boxes, setting it apart from models that treat composition as uncontrollable. Released October 2026 under Apache 2.0.
How does layout-guided generation work with bounding boxes?
You draw boxes on a canvas and label each one. Text boxes carry the exact words to render. Object boxes carry a description of what goes there. The workflow converts those boxes into a structured JSON layout prompt that the model reads alongside your scene prompt. The model generates one image with each element placed inside its assigned box.
Can MOSS-Image render text accurately in images?
Yes. Accurate text rendering is one of the model’s core strengths. On the LongLongTextBench benchmark, MOSS-Image scores 96.3% average text coverage, the highest among open-weight models. It handles English and Chinese text natively, including long strings and multi-line text blocks.
What is the difference between MOSS-Image Base and SFT?
MOSS-Image Base is the pre-trained foundation model, designed for fine-tuning and LoRA training. MOSS-Image SFT is a supervised fine-tune of Base on curated data, producing tighter text grouping and more organized layouts. This workflow uses the SFT checkpoint, which is the better choice for generating finished images.
Should I use the prompt enhancer with bounding boxes?
No. The prompt enhancer rewrites the prompt and can strip out the JSON layout data, causing the model to ignore your bounding box placement. Keep the prompt enhancer off when using layout-guided generation. It is disabled by default in this workflow for that reason.
Is MOSS-Image free for commercial use?
Yes. MOSS-Image is released under the Apache 2.0 license, which allows commercial use. You can use generated images in client work, marketing, editorial, and print projects. Outputs generated on Floyo carry full commercial rights.
How to run MOSS-Image online?
You can run MOSS-Image online through Floyo. No installation, no setup, no API key to wire up. Open the workflow in your browser, draw your layout, write a prompt, and hit run. Free to try.
WHY FLOYO?
Floyo is the only platform with team collaboration for ComfyUI in the browser. You run workflows with no install. You share run history, assets, and models across your team. You pay only when you generate. Floyo supports open-source and closed-source models.
A designer runs an edit and likes the result. A teammate opens that exact run from shared history and keeps going. No file handoffs. No version confusion.
For studios and enterprise teams, Floyo adds private workspaces, pooled resources, and a team usage dashboard. Other ComfyUI cloud tools run for one person at a time. Floyo runs for the whole team, with transparent per-generation costs.
Ready to try it?
Draw your first layout, write a prompt, and run it. The model and settings are already set.
Questions? Watch the free course or check the FAQ above.
Read more