Minimax H3 for Image Editing
Edit any image with a text instruction using MiniMax H3-Image, an open-weight model that generates up to 4K resolution. Upload an image, describe the change, and hit run.
Image
Image Editing
Minimax H3
49


ABOUT THE WORKFLOW
Edit an image from a short instruction
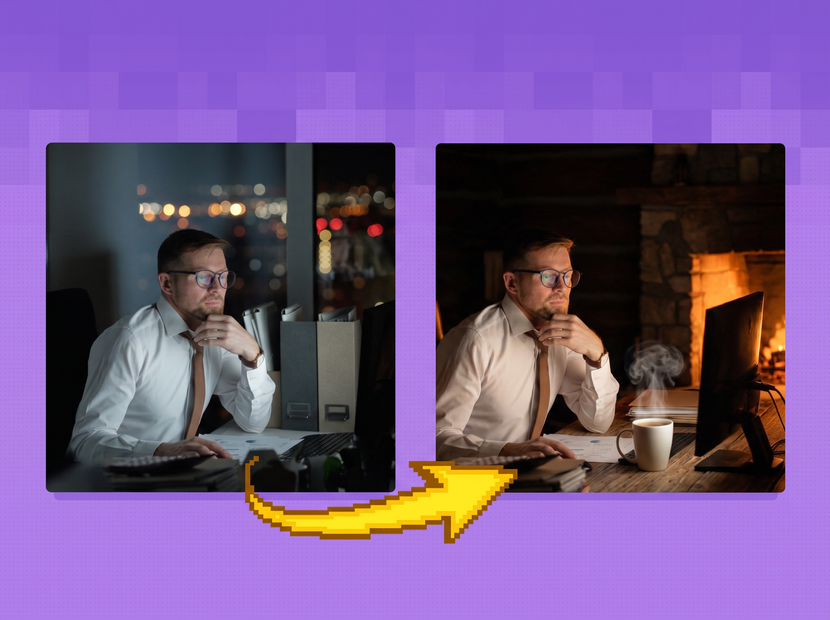
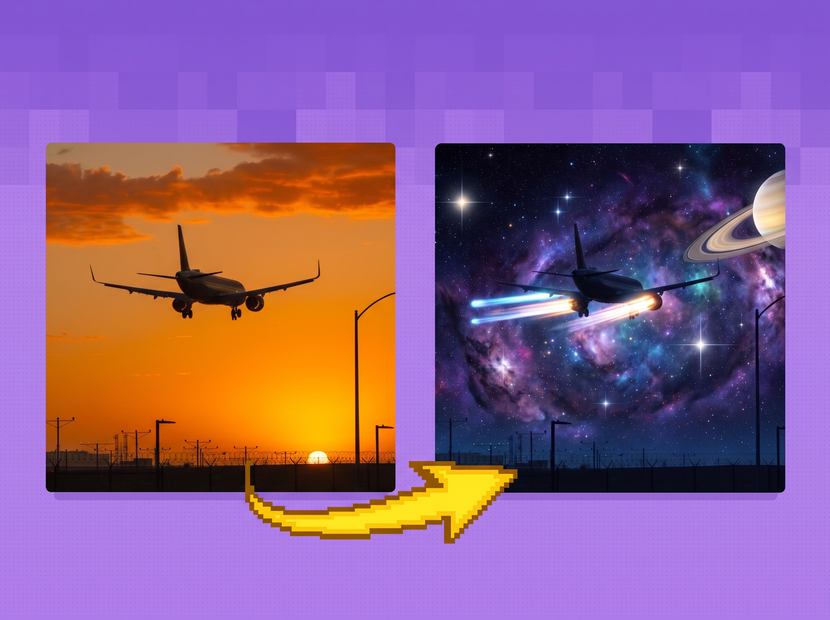
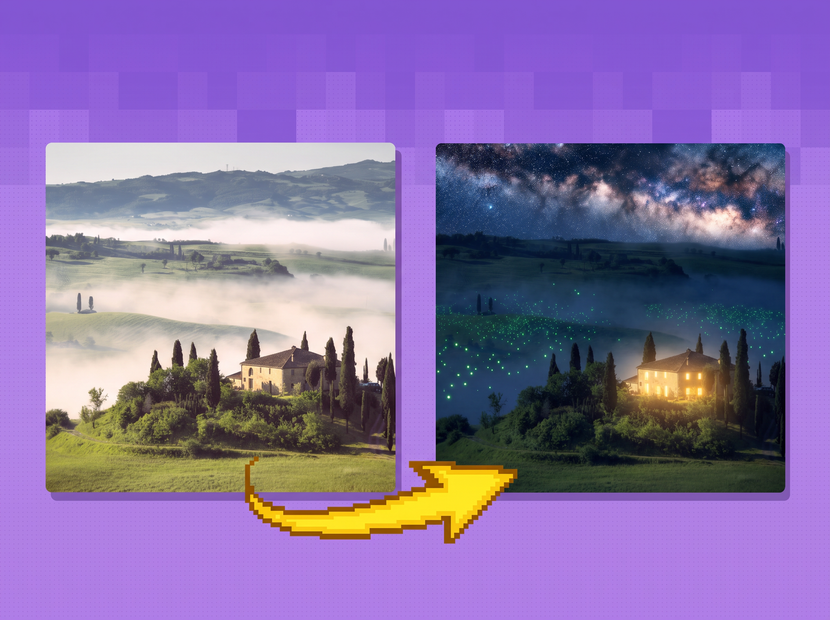
Upload a photo and describe what to change. A built-in prompt enhancer rewrites your instruction into a detailed description, then the model generates the edit at your original aspect ratio. A before-and-after comparison appears so you can check the result.
Model
MiniMax H3-Image by MiniMax. Part of the H3 family. Strong at instruction-following edits, multi-reference generation, and high-resolution output up to 16 megapixels.
HOW IT WORKS
Step 1. Upload your image
The photo you want to edit. Any size works. It will be scaled to about 4 megapixels before processing.
Works great with: photos · product shots · illustrations · designs
Step 2. Describe the change
Type a short editing instruction. Be specific about what to add, remove, or replace. “Replace the yellow taxi with a pastel pink ice-cream truck with a scalloped awning” is better than “change the car.”
Step 3. Toggle the prompt enhancer (optional)
On by default. It rewrites your short instruction into a detailed description the model can follow more closely. Turn it off if you want to control the prompt yourself.
Step 4. Hit run and compare
The model generates the edited image at your original aspect ratio. A side-by-side comparison of the original and the result appears on screen. Download the PNG when you are happy.
Ready for: Photoshop · Figma · Canva · any editor
First time? Leave every setting as-is. The defaults are the right starting point for almost everyone.
RECOMMENDED SETTINGS
Source Image (Required)
Loaded via LoadImage node
Any size works — auto-scaled to about 4 megapixels before processing (ResizeImageMaskNode, "scale total pixels" at 4 MP)
Then snapped to multiples of 32 (second ResizeImageMaskNode, "scale to multiple" at 32)
Editing Instruction / User Prompt (Required)
Text field describing what to change — be specific about what to add, remove, or replace
Reference the source image as
<Picture 1>in the promptExample: "Replace the vintage yellow taxi in <Picture 1> with a pastel pink ice-cream truck with a scalloped awning"
Prompt Enhancer
On by default (Boolean toggle "Enable PE?" set to true)
Uses Qwen 3.5 9B (qwen3.5_9b_w4a8_gptq.safetensors) via TextGenerateV2 node
Rewrites your short instruction into a detailed reference-conditioned description
Outputs a JSON with expanded_caption and target_aspect_ratio
When off, your editing instruction is used exactly as written
Enhancer settings: temperature 1, top_k 20, top_p 0.95, max_length 8196, thinking enabled
Resolution
Input image auto-scaled to 4 MP then snapped to multiples of 32
Output matches the input image’s aspect ratio automatically
Model supports output up to 16 megapixels (4K)
KSampler Settings
Steps: 6 (designed for exactly 6 steps — more is not better)
CFG: 1 (effectively no classifier-free guidance)
Sampler: euler
Scheduler: simple
Denoise: 1
Seed: randomized by default — set a specific number to reproduce the same result
Models
Diffusion: minimax_h3_image_pruned_int8_convrot.safetensors (UNETLoader)
Text encoder for generation: qwen3vl_32b_minimax_h3_int8_convrot.safetensors (CLIPLoader)
Text encoder for prompt enhancer: qwen3.5_9b_w4a8_gptq.safetensors (CLIPLoader)
VAE: minimax_h3_image_vae_fp16.safetensors (VAELoader)
Output
One edited image saved as PNG (prefix "image_minimax_h3_image_edit")
A side-by-side before-and-after comparison shown via ImageCompare node
Parts you did not mention in the prompt stay unchanged
Common Error-Causing Mistakes to Avoid
Increasing steps beyond 6 — H3-Image is designed for exactly 6 steps, more is not better
Increasing CFG above 1 — the model uses no classifier-free guidance by design
Vague instructions like "make it better" — be specific about what to add, remove, or replace
Not referencing the source image as
<Picture 1>in the prompt — the enhancer and model need explicit picture tagsEditing complex scenes with many small changes at once — can cause drift; edit one thing at a time
Expecting the enhancer to follow your exact wording — it rewrites extensively; turn it off if you need exact control
Very large input images without enough VRAM — the 4 MP auto-scaling helps, but higher megapixels still cost more
Recommended Safe Defaults
Steps: 6
CFG: 1
Sampler: euler
Scheduler: simple
Seed: random
Prompt enhancer: on
Input image: auto-scaled to 4 MP
Be specific about what to change and reference images as
<Picture 1>Leave all settings at defaults for a first run
LEARN
📹 Videos
ComfyUI 101 Free Course ft. Sebastian Kamph
Floyo 101 for Team Collaboration
✨ Quick links
USE CASES
🎨 Style Transfer
Upload a photo and describe a new art style. The model redraws the image in that style while keeping the composition.
🖼️ Object Replacement
Swap out one object for another. Replace a car with a truck, a lamp with a plant, or a plain wall with a bookshelf.
🏞️ Background Changes
Change the setting behind a subject. Move a portrait from a studio to a city street or a forest path.
🛍️ Product Shot Refinement
Adjust a product image for a campaign. Change colors, swap props, or place the product in a new scene.
✏️ Detail Corrections
Fix small issues in a photo. Remove a stray object, adjust an expression, or change a color that does not match the brief.
WHAT WORKS BEST / WHAT TO AVOID
✅ Works great
Clear, single-change instructions
Clean source images with a defined subject
Object swaps and background replacements
Style changes described in specific terms
⚠️ May produce softer results
Many small edits packed into one instruction
Vague prompts like “make it look better”
Very small or low-resolution source images
Complex scenes where the target area is hard to isolate
FAQ
What is MiniMax H3-Image?
MiniMax H3-Image is an open-weight image generation model by MiniMax, released November 2026 as part of the H3 family. It takes a text prompt and up to 16 reference images and generates images up to 16 megapixels (4K). This workflow runs it in edit mode, where you upload an image and describe what to change.
How does the prompt enhancer work?
The workflow includes a built-in prompt enhancer powered by a Qwen 3.5 language model. It takes your short editing instruction and rewrites it into a detailed, structured description that the image model can follow more precisely. You can toggle it off if you prefer to write the full prompt yourself.
Can I edit specific parts of an image without changing the rest?
Yes. Describe what to change and what to keep. The model preserves your original aspect ratio and tries to leave untouched areas alone. For best results, name the specific element you want changed and mention that the rest should stay the same.
What resolution does the output have?
The source image is scaled to about 4 megapixels for processing, and the output matches that resolution. MiniMax H3-Image supports generation up to 16 megapixels, but this workflow targets 4 megapixels to balance quality and speed.
Can I use MiniMax H3-Image for commercial projects?
MiniMax H3-Image is released under the MiniMax H3-Image Community License. It is free for most uses, but the license excludes users in the US, EU, UK, and South Korea. Check the license terms on the model page before using outputs in commercial work.
Is MiniMax H3-Image better than other editing models?
MiniMax H3-Image is strong at instruction-following edits, multi-reference generation, and high-resolution output. It runs in 6 sampling steps by default, which makes it fast. For complex scenes with many small simultaneous changes, the results can drift. It works best with focused, single-change instructions.
How to run MiniMax H3-Image online?
You can run MiniMax H3-Image online through Floyo. No installation, no setup, no API key to wire up. Open the workflow in your browser, upload your inputs, and hit run. Free to try.
WHY FLOYO?
Floyo is the only platform with team collaboration for ComfyUI in the browser. You run workflows with no install. You share run history, assets, and models across your team. You pay only when you generate. Floyo supports open-source and closed-source models.
A designer runs an edit and likes the result. A teammate opens that exact run from shared history and keeps going. No file handoffs. No version confusion.
For studios and enterprise teams, Floyo adds private workspaces, pooled resources, and a team usage dashboard. Other ComfyUI cloud tools run for one person at a time. Floyo runs for the whole team, with transparent per-generation costs.
Ready to try it?
Upload an image, describe the change, and see the before-and-after in seconds.
Questions? Watch the free course or check the FAQ above.
Read more