Flux Image Upscaler with UltimateSD
A simple workflow to enlarge & add detail to an existing image. Key Inputs Image: Use any JPG or PNG Upscale by: The factor of magnification Denoise: The amount of variance in the new image. Higher has more variance.
Flux
Image
UltimateSD
Upscale
7
1.4k

Nodes & Models
UNETLoader
flux1-dev.safetensors
DualCLIPLoader
t5xxl_fp16.safetensors
clip_l.safetensors
VAELoader
ae.safetensors
Label (rgthree)
LoadImage
UpscaleModelLoader
4x-UltraSharp.pth
CLIPTextEncode
FluxGuidance
UltimateSDUpscale
SaveImage
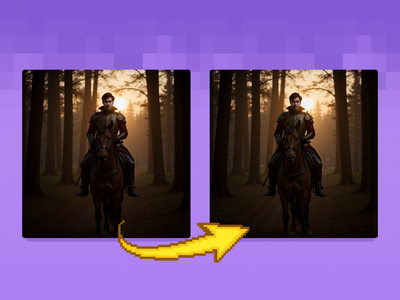
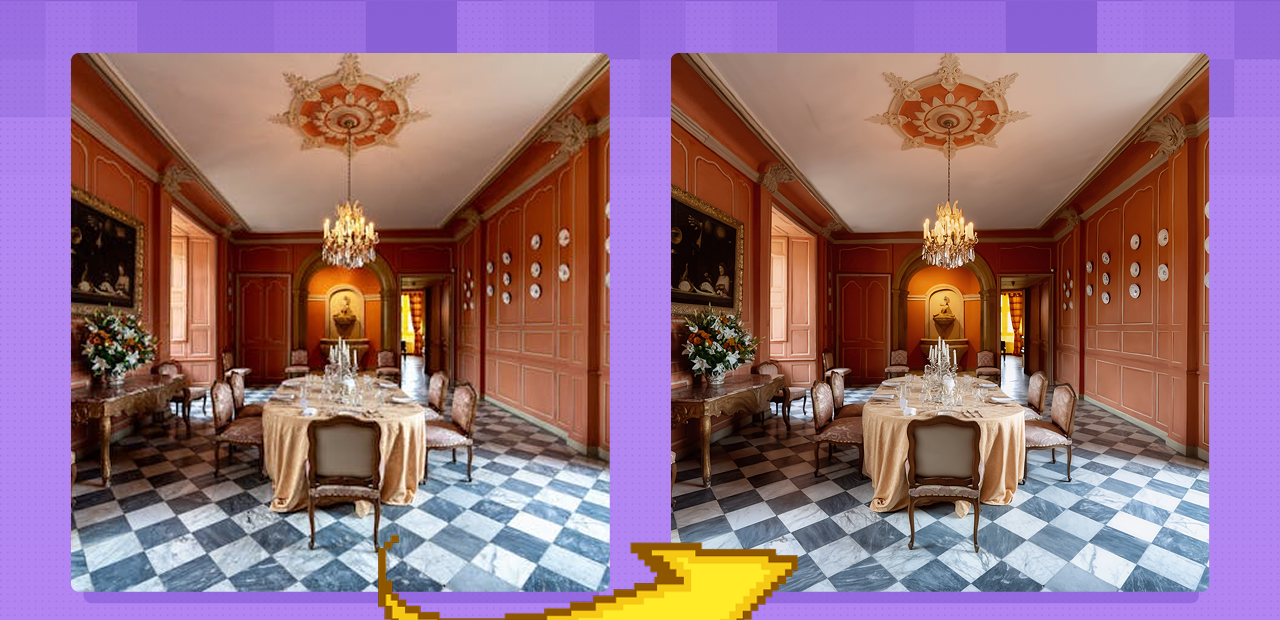
Flux 1 Dev image upscaling with UltimateSD. Upload an image, set the scale factor and denoise, and generate a larger version with sharpened detail.
The workflow runs in four labeled steps: upload the image, set the upscale factor, run the upscale pass, and save. UltimateSD splits the image into 1024px tiles, upscales each with 4x-UltraSharp, and then runs Flux 1 Dev at a low denoise of 0.15 to refine texture and add detail without changing the composition. The tiled approach handles images of any size without running out of VRAM.
How do you use the Flux Image Upscaler with UltimateSD?
Upload your image (JPG or PNG), set the upscale factor, adjust denoise if needed, and run. 4x-UltraSharp handles the initial pixel upscale. Flux 1 Dev refines detail at denoise 0.15 in 1024px tiles. The prompt is optional. Leave it empty for neutral upscaling or add descriptive terms to guide the detail refinement.
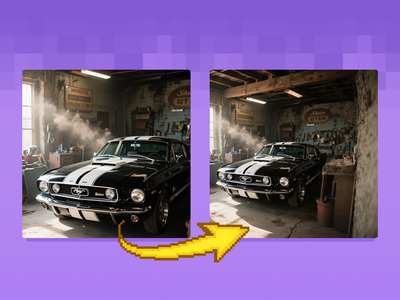
Step 1: Load image Upload any JPG or PNG. The workflow handles any resolution and aspect ratio. The example input is a detailed interior scene, the kind of image where the tiled upscaling approach produces the most visible improvement in fine texture and architectural detail.
Step 2: Set upscale factor (default: 2x) How much larger the output should be. 2x doubles each dimension (a 1024x1024 image becomes 2048x2048). The 4x-UltraSharp upscale model performs the actual pixel multiplication; Flux then refines the result at the upscaled resolution.
Common use cases: 2x for standard upscaling from AI-generated images at 512-768px to print-adjacent size. 1.5x when you need a moderate size increase without aggressive sharpening. 3-4x when starting from a low resolution source and need to reach screen or print resolution.
Step 3: Set denoise (default: 0.15) Controls how much the Flux diffusion pass changes the upscaled image. At 0.15, the pass refines texture and edge sharpness while staying close to the original structure. Composition, colors, and content remain unchanged.
Want sharper texture and more detail generation? Try 0.2-0.3. The output will add more micro-detail and sharpness, but may deviate slightly from the original. Want the output to stay as close to the original as possible while gaining resolution? Keep at 0.15 or lower. At 0.5 and above, the diffusion pass starts meaningfully changing content. That's usually too high for a straightforward upscale.
Step 4: Prompt (optional, empty by default) The positive prompt is empty by default, which produces neutral upscaling guided only by the image content. Add descriptive terms to steer the detail refinement: "highly detailed, sharp focus, natural textures" reinforces detail quality. For specific subject types: "realistic skin texture" for portraits, "sharp fabric weave" for fashion, "precise architectural detail" for environments.
Flux guidance (default: 3.5) Flux 1 Dev guidance scale. 3.5 is standard for Flux. Leave at default for upscaling.
Tile settings (1024x1024, padding 32) UltimateSD tiles the upscaled image into 1024x1024 sections and processes each separately. This allows upscaling of large images without VRAM limits. Tiles overlap at the edges (padding 32px) to prevent visible seam lines between sections.
What is the Flux Image Upscaler with UltimateSD good for?
This workflow is strongest for upscaling where you want added detail and sharpness, not only more pixels. The combination of 4x-UltraSharp for initial upscaling and Flux at low denoise for refinement produces sharper, more texture-coherent results than single-model upscalers. Works on any image type at any starting resolution.
AI-generated images at small sizes. Most image generation produces 512-1024px outputs. Run them through this workflow to reach 2048px or higher with sharpened texture detail that makes the larger version look intentional rather than stretched.
Product photography for print and large-format display. Bring product shots to print resolution while recovering fabric texture, surface detail, and edge sharpness. At denoise 0.15, the product's appearance stays intact.
Architectural and environment renders. The tiled approach handles large renders and architectural images that would exceed single-tile VRAM limits. Structural detail, surface texture, and fine environmental elements all sharpen in the refinement pass.
Portrait upscaling. At 0.15 denoise, the Flux pass sharpens skin texture and facial detail without hallucinating features. For portraits where skin accuracy matters, this is the correct starting denoise.
Honest notes: the 4x-UltraSharp model sharpens aggressively. For images that are already sharp at source resolution, this can produce an over-sharpened look before the Flux pass. If the output looks too crisp or has sharpening halos, reduce the upscale factor or try a less aggressive upscale model. The Flux refinement pass at 0.15 denoise produces subtle texture improvement. For significant texture enhancement, SeedVR2 or a diffusion upscaler at higher denoise gives more dramatic results.
How does Flux + UltimateSD upscaling compare to single-model upscalers?
Single upscalers (ESRGAN, 4x-UltraSharp alone) scale pixels using learned patterns. They're fast and predictable but don't generate new texture. Flux at low denoise adds texture that wasn't there: the refinement pass generates new detail at the upscaled resolution rather than interpolating existing pixels.
4x-UltraSharp alone produces sharp, clean upscales without the Flux refinement. It's faster and stays closer to the source. Use it when you want predictable results without any generation variance.
This two-stage workflow produces more detailed, texture-rich results than the upscale model alone. The Flux pass can add micro-detail (fine skin texture, fabric grain, surface variation) that the deterministic upscaler can't. The tradeoff is longer generation time and occasional minor variance from the source at higher denoise settings.
SeedVR2 and diffusion upscalers at higher denoise produce more aggressive texture enhancement. This Flux workflow at 0.15 is the lower end of the diffusion upscaling range: detail-enhancing without content-changing.
FAQ
What denoise level should I use for Flux upscaling?
Default is 0.15. Keep it at 0.15 for upscaling that stays close to the original image while sharpening texture and detail. Try 0.2-0.3 for more visible texture enhancement. Stay below 0.4 for a straightforward upscale. Above that, the diffusion pass starts altering content noticeably.
What upscale factor should I set?
2x for most use cases, which doubles each dimension. Use 1.5x for a moderate size increase. Use 3-4x when starting from low resolution. The 4x-UltraSharp model handles the actual pixel multiplication; Flux refines the result.
Can I add a prompt to guide the upscaling?
Yes. The prompt is optional and empty by default. Adding descriptive terms steers the Flux refinement: "highly detailed, sharp focus, natural textures" for general quality, "realistic skin texture" for portraits, "precise architectural detail" for environments. Keep prompts short and descriptive.
Why does the workflow use tiles instead of upscaling the full image at once?
UltimateSD's tiled approach lets you upscale images of any size without VRAM limits. A 2x upscale of a 2048px image produces 4096px output. Too large to process in one pass on most GPUs. Tiles process 1024x1024 sections with 32px overlap to prevent seam lines.
How do I run the Flux Image Upscaler with UltimateSD online?
You can run this workflow online through Floyo. No installation, no setup. Open the workflow in your browser, upload your image, and hit run. Free to try.
Read more